快速入门
欢迎来到 React 文档!本章节将介绍你每天都会使用的 80% 的 React 概念。
你将会学习到
- 如何创建和嵌套组件
- 如何添加标签和样式
- 如何显示数据
- 如何渲染条件和列表
- 如何对事件做出响应并更新界面
- 如何在组件间共享数据
创建和嵌套组件
React 应用程序是由 组件 组成的。一个组件是 UI(用户界面)的一部分,它拥有自己的逻辑和外观。组件可以小到一个按钮,也可以大到整个页面。
React 组件是返回标签的 JavaScript 函数:
function MyButton() {
  return (
    <button>我是一个按钮</button>
  );
}
至此,你已经声明了 MyButton,现在把它嵌套到另一个组件中:
export default function MyApp() {
  return (
    <div>
      <h1>欢迎来到我的应用</h1>
      <MyButton />
    </div>
  );
}
你可能已经注意到 <MyButton /> 是以大写字母开头的。你可以据此识别 React 组件。React 组件必须以大写字母开头,而 HTML 标签则必须是小写字母。
来看下效果:
function MyButton() {
  return (
    <button>
      我是一个按钮
    </button>
  );
}

export default function MyApp() {
  return (
    <div>
      <h1>欢迎来到我的应用</h1>
      <MyButton />
    </div>
  );
}
export default 关键字指定了文件中的主要组件。如果你对 JavaScript 某些语法不熟悉,可以参考 MDN 和 javascript.info。
使用 JSX 编写标签
上面所使用的标签语法被称为 JSX。它是可选的,但大多数 React 项目会使用 JSX,主要是它很方便。所有 我们推荐的本地开发工具 都开箱即用地支持 JSX。
JSX 比 HTML 更加严格。你必须闭合标签,如 <br />。你的组件也不能返回多个 JSX 标签。你必须将它们包裹到一个共享的父级中,比如 <div>...</div> 或使用空的 <>...</> 包裹:
function AboutPage() {
  return (
    <>
      <h1>关于</h1>
      <p>你好。<br />最近怎么样?</p>
    </>
  );
}
如果你有大量的 HTML 需要移植到 JSX 中,你可以使用 在线转换器。
添加样式
在 React 中,你可以使用 className 来指定一个 CSS 的 class。它与 HTML 的 class 属性的工作方式相同:
<img className="avatar" />然后,你可以在一个单独的 CSS 文件中为它编写 CSS 规则:
/* 在你的 CSS 文件中修改 */
.avatar {
  border-radius: 50%;
}
React 并没有规定你如何添加 CSS 文件。最简单的方式是使用 HTML 的 <link> 标签。如果你使用了构建工具或框架,请阅读其文档来了解如何将 CSS 文件添加到你的项目中。
显示数据
JSX 会让你把标签放到 JavaScript 中。而大括号会让你 “回到” JavaScript 中,这样你就可以从你的代码中嵌入一些变量并展示给用户。例如,这将显示 user.name:
return (
  <h1>
    {user.name}
  </h1>
);
你还可以将 JSX 属性 “转义到 JavaScript”,但你必须使用大括号 而非 引号。例如,className="avatar" 是将 "avatar" 字符串传递给 className,作为 CSS 的 class。但 src={user.imageUrl} 会读取 JavaScript 的 user.imageUrl 变量,然后将该值作为 src 属性传递:
return (
  <img
    className="avatar"
    src={user.imageUrl}
  />
);
你也可以把更为复杂的表达式放入 JSX 的大括号内,例如 字符串拼接:
const user = {
  name: 'Hedy Lamarr',
  imageUrl: 'https://i.imgur.com/yXOvdOSs.jpg',
  imageSize: 90,
};

export default function Profile() {
  return (
    <>
      <h1>{user.name}</h1>
      <img
        className="avatar"
        src={user.imageUrl}
        alt={'Photo of ' + user.name}
        style={{
          width: user.imageSize,
          height: user.imageSize
        }}
      />
    </>
  );
}
在上面示例中,style={{}} 并不是一个特殊的语法,而是 style={ } JSX 大括号内的一个普通 {} 对象。当你的样式依赖于 JavaScript 变量时,你可以使用 style 属性。
条件渲染
React 没有特殊的语法来编写条件语句,因此你使用的就是普通的 JavaScript 代码。例如使用 if 语句根据条件引入 JSX:
let content;
if (isLoggedIn) {
  content = <AdminPanel />;
} else {
  content = <LoginForm />;
}
return (
  <div>
    {content}
  </div>
);
如果你喜欢更为紧凑的代码,可以使用 条件 ? 运算符。与 if 不同的是,它工作于 JSX 内部:
<div>
  {isLoggedIn ? (
    <AdminPanel />
  ) : (
    <LoginForm />
  )}
</div>
当你不需要 else 分支时,你也可以使用更简短的 逻辑 && 语法:
<div>
  {isLoggedIn && <AdminPanel />}
</div>
所有这些方法也适用于有条件地指定属性。如果你对 JavaScript 语法不熟悉,你可以先使用 if...else。
渲染列表
你将依赖 JavaScript 的特性,例如 for 循环 和 array 的 map() 函数 来渲染组件列表。
假设你有一个产品数组:
const products = [
  { title: 'Cabbage', id: 1 },
  { title: 'Garlic', id: 2 },
  { title: 'Apple', id: 3 },
];
在你的组件中,使用 map() 函数将这个数组转换为 <li> 标签构成的列表:
const listItems = products.map(product =>
  <li key={product.id}>
    {product.title}
  </li>
);

return (
  <ul>{listItems}</ul>
);
注意, <li> 有一个 key 属性。对于列表中的每一个元素,你都应该传递一个字符串或者数字给 key,用于在其兄弟节点中唯一标识该元素。通常 key 来自你的数据,比如数据库中的 ID。如果你在后续插入、删除或重新排序这些项目,React 将依靠你提供的 key 来思考发生了什么。
const products = [
  { title: '卷心菜', isFruit: false, id: 1 },
  { title: '大蒜', isFruit: false, id: 2 },
  { title: '苹果', isFruit: true, id: 3 },
];

export default function ShoppingList() {
  const listItems = products.map(product =>
    <li
      key={product.id}
      style={{
        color: product.isFruit ? 'magenta' : 'darkgreen'
      }}
    >
      {product.title}
    </li>
  );

  return (
    <ul>{listItems}</ul>
  );
}
响应事件
你可以通过在组件中声明 事件处理 函数来响应事件:
function MyButton() {
  function handleClick() {
    alert('You clicked me!');
  }

  return (
    <button onClick={handleClick}>
      点我
    </button>
  );
}注意,onClick={handleClick} 的结尾没有小括号!不要 调用 事件处理函数:你只需 把函数传递给事件 即可。当用户点击按钮时 React 会调用你传递的事件处理函数。
更新界面
通常你会希望你的组件 “记住” 一些信息并展示出来,比如一个按钮被点击的次数。要做到这一点,你需要在你的组件中添加 state。
首先,从 React 引入 useState:
import { useState } from 'react';现在你可以在你的组件中声明一个 state 变量:
function MyButton() {
  const [count, setCount] = useState(0);
  // ...
你将从 useState 中获得两样东西:当前的 state(count),以及用于更新它的函数(setCount)。你可以给它们起任何名字,但按照惯例会像 [something, setSomething] 这样为它们命名。
第一次显示按钮时,count 的值为 0,因为你把 0 传给了 useState()。当你想改变 state 时,调用 setCount() 并将新的值传递给它。点击该按钮计数器将递增:
function MyButton() {
  const [count, setCount] = useState(0);

  function handleClick() {
    setCount(count + 1);
  }

  return (
    <button onClick={handleClick}>
      Clicked {count} times
    </button>
  );
}
React 将再次调用你的组件函数。第一次 count 变成 1。接着点击会变成 2。继续点击会逐步递增。
如果你多次渲染同一个组件,每个组件都会拥有自己的 state。你可以尝试点击不同的按钮:
import { useState } from 'react';

export default function MyApp() {
  return (
    <div>
      <h1>独立更新的计数器</h1>
      <MyButton />
      <MyButton />
    </div>
  );
}

function MyButton() {
  const [count, setCount] = useState(0);

  function handleClick() {
    setCount(count + 1);
  }

  return (
    <button onClick={handleClick}>
      点了 {count} 次
    </button>
  );
}
注意,每个按钮会 “记住” 自己的 count,而不影响其他按钮。
使用 Hook
以 use 开头的函数被称为 Hook。useState 是 React 提供的一个内置 Hook。你可以在 React API 参考 中找到其他内置的 Hook。你也可以通过组合现有的 Hook 来编写属于你自己的 Hook。
Hook 比普通函数更为严格。你只能在你的组件(或其他 Hook)的 顶层 调用 Hook。如果你想在一个条件或循环中使用 useState,请提取一个新的组件并在组件内部使用它。
组件间共享数据
在前面的示例中,每个 MyButton 都有自己独立的 count,当每个按钮被点击时,只有被点击按钮的 count 才会发生改变:
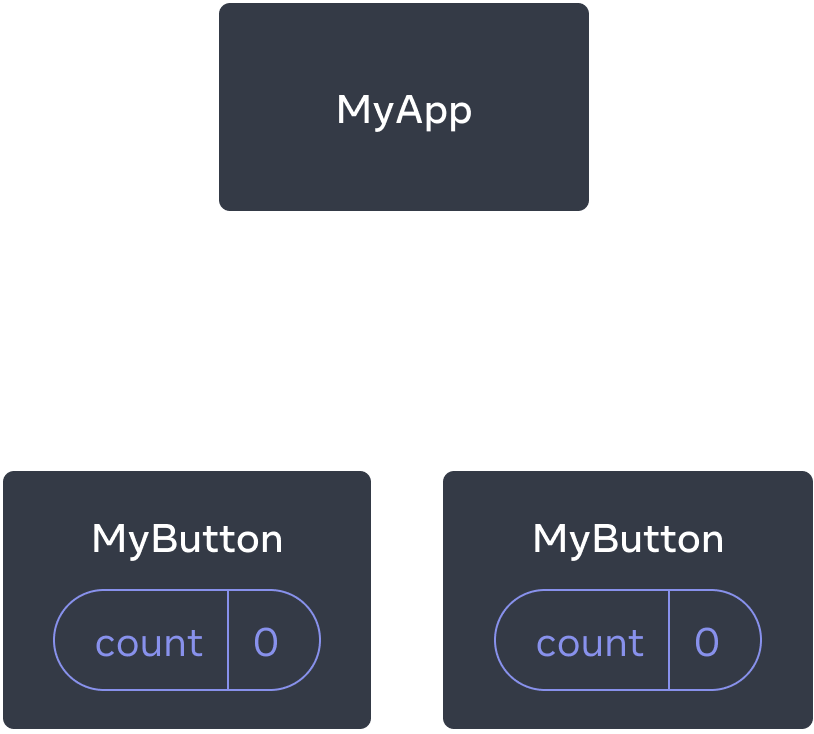
起初,每个 MyButton 的 count state 均为 0
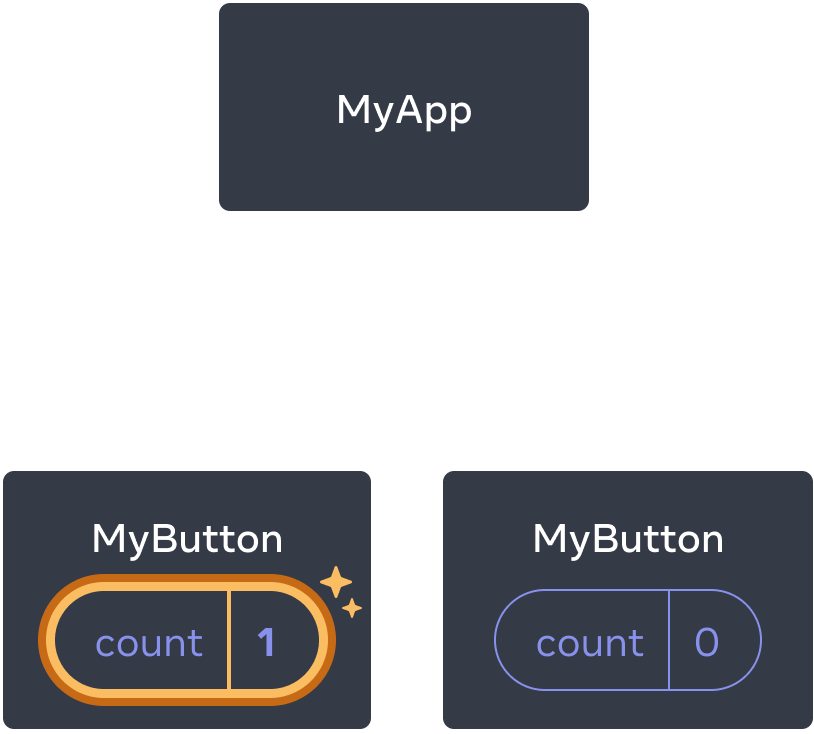
第一个 MyButton 会将 count 更新为 1
然而,你经常需要组件 共享数据并一起更新。
为了使得 MyButton 组件显示相同的 count 并一起更新,你需要将各个按钮的 state “向上” 移动到最接近包含所有按钮的组件之中。
在这个示例中,它是 MyApp:
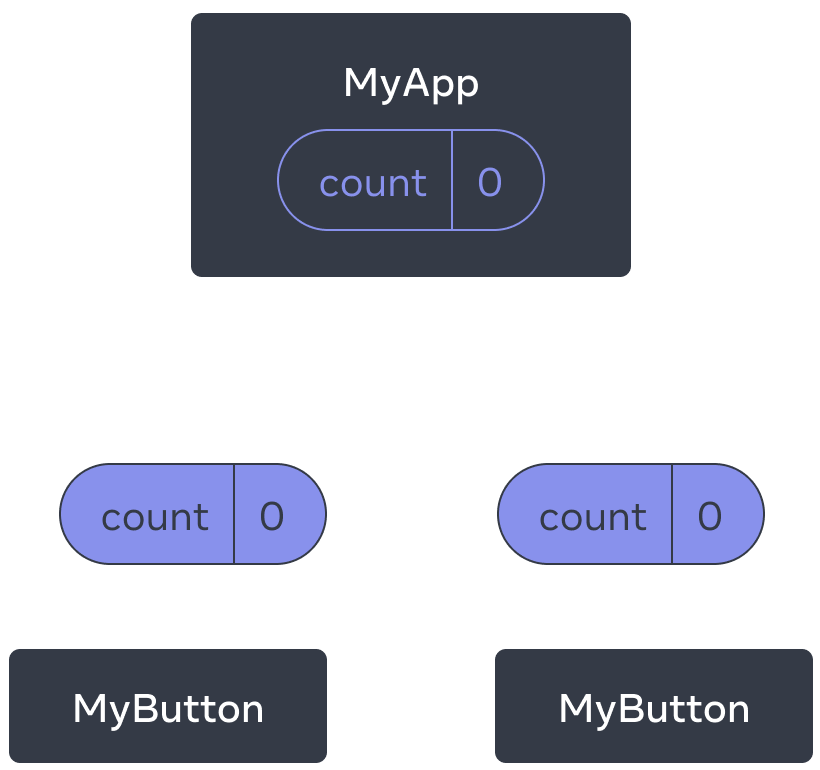
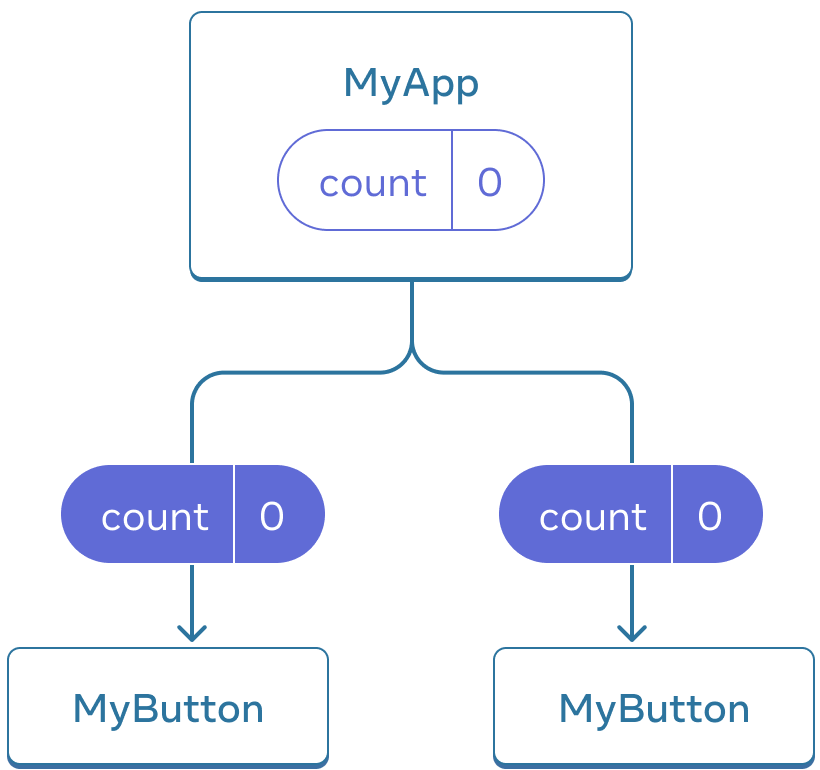
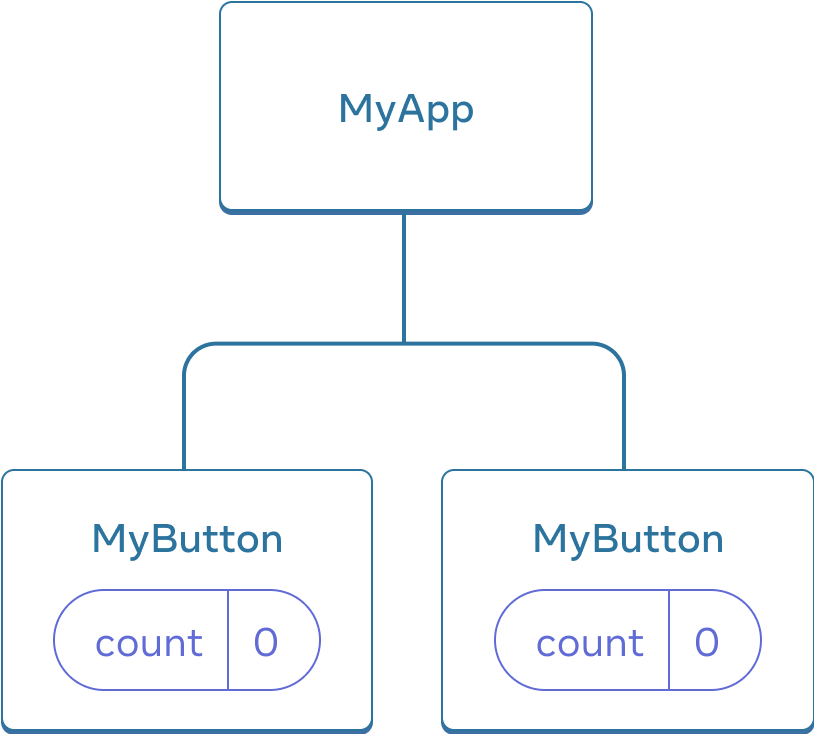
起初,MyApp 的 count state 为 0 并传递给了两个子组件
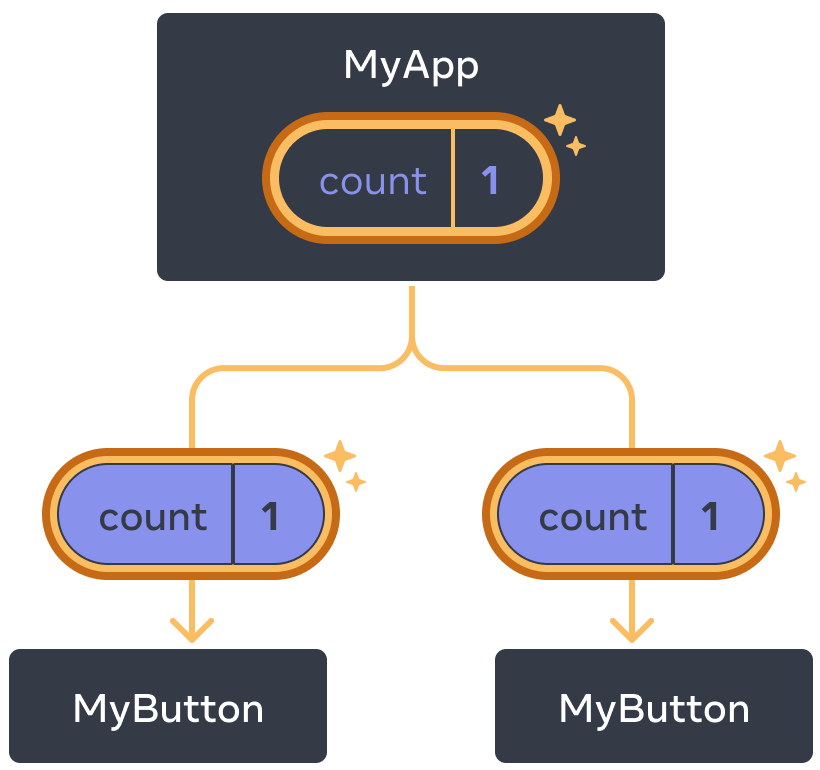
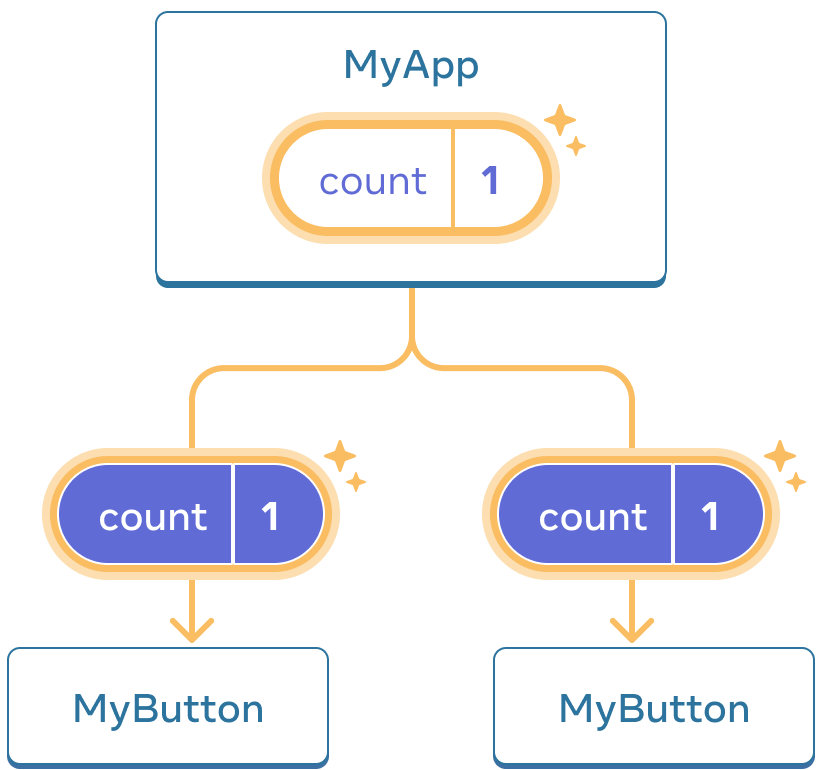
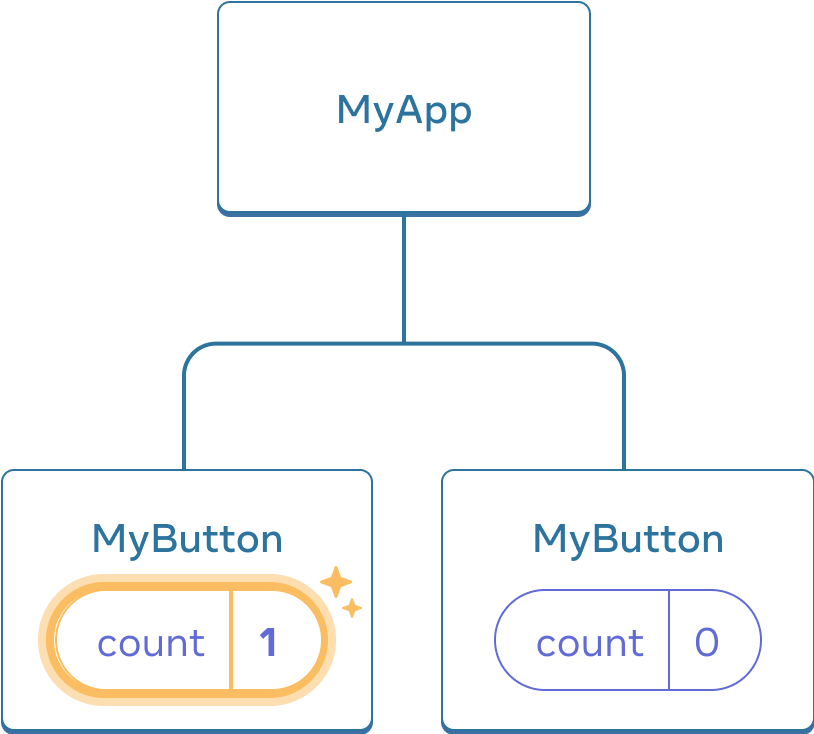
点击后,MyApp 将 count state 更新为 1,并将其传递给两个子组件
此刻,当你点击任何一个按钮时,MyApp 中的 count 都将改变,同时会改变 MyButton 中的两个 count。具体代码如下:
首先,将 MyButton 的 state 上移到 MyApp 中:
export default function MyApp() {
  const [count, setCount] = useState(0);

  function handleClick() {
    setCount(count + 1);
  }

  return (
    <div>
      <h1>独立更新的计数器</h1>
      <MyButton />
      <MyButton />
    </div>
  );
}

function MyButton() {
  // ... 我们正在从这里移动代码...
}
接着,将 MyApp 中的点击事件处理函数以及 state 一同向下传递到 每个 MyButton 中。你可以使用 JSX 的大括号向 MyButton 传递信息。就像之前向 <img> 等内置标签所做的那样:
export default function MyApp() {
  const [count, setCount] = useState(0);

  function handleClick() {
    setCount(count + 1);
  }

  return (
    <div>
      <h1>共同更新的计数器</h1>
      <MyButton count={count} onClick={handleClick} />
      <MyButton count={count} onClick={handleClick} />
    </div>
  );
}
使用这种方式传递的信息被称作 prop。此时 MyApp 组件包含了 count state 以及 handleClick 事件处理函数,并将它们作为 prop 传递给 了每个按钮。
最后,改变 MyButton 以 读取 从父组件传递来的 prop:
function MyButton({ count, onClick }) {
  return (
    <button onClick={onClick}>
      点了 {count} 次
    </button>
  );
}当你点击按钮时,onClick 处理程序会启动。每个按钮的 onClick prop 会被设置为 MyApp 内的 handleClick 函数,所以函数内的代码会被执行。该代码会调用 setCount(count + 1),使得 state 变量 count 递增。新的 count 值会被作为 prop 传递给每个按钮,因此它们每次展示的都是最新的值。这被称为“状态提升”。通过向上移动 state,我们实现了在组件间共享它。
import { useState } from 'react';

export default function MyApp() {
  const [count, setCount] = useState(0);

  function handleClick() {
    setCount(count + 1);
  }

  return (
    <div>
      <h1>共同更新的计数器</h1>
      <MyButton count={count} onClick={handleClick} />
      <MyButton count={count} onClick={handleClick} />
    </div>
  );
}

function MyButton({ count, onClick }) {
  return (
    <button onClick={onClick}>
      点了 {count} 次
    </button>
  );
}